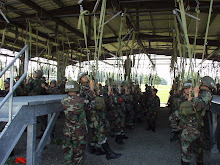
Day: April 29, 2009 JUMP DAY #3 “THE FINAL JUMP”
Weather report: mid-80’s today, humidity 42% wind 5 SSE
My day started at 0700hrs. I woke up and slept very hard last night. I was in much need of some rest and recovery time. I failed to do laundry on Sunday and decided to sit outside on the bench and wash my clothes. To my surprise a washing machine was not being used. This made my day start off really well. I started packing my clothes and my gear that I would not need for the rest of my stay here and am getting excited about going home of Friday. This school has gone by very fast, yet the days have been brutal at times and extremely long with the heat.
Formation at 1400hrs and move out to the PIT for refresher training on hazards, PLF’s and mock door exits. It is sad that this is the last time that we will perform these drills. We will have successfully completed the Airborne Course tonight after our fifth and final jump, THE NIGHT FULL COMBAT JUMP. The other jumps have been fun and interesting to this point and the stories of my fellow paratroopers and their experiences have been exaggerated at times but fun to talk about.
Tonight our jump went off without any problems. We started loading the planes at 2030hrs. The sun was beginning to set and the sky line was beautiful. Patchy cloud cover and the oranges, reds, and yellows were very impressive. As we made the turn for the plane you could tell it was going to be a very different experience. We approached the ramp to load and the aircraft had the eerie night operations lights inside had a greenish blue glow about them. This jump we has some of the Best Ranger Challenge personal on our jump. They went first and their jumpmaster handed off his static line and leapt out of the aircraft. The next pass and it was our turn. The jump commands began and we headed for the door. Green light and out we went, I was the number thirteen Jumper in the stick and was at the nose of the plane. Shuffle, shuffle, shuffle, had the static line off to the Jumpmaster Safety and turned kicked my leg up and out and felt the breeze push me past the rear of our bird. Three Thousand and a tug on my shoulders, my last jump and decent had begun. It was neat to see the parachute light up by the moonlight and the stars. I checked my canopy twice because of the low visibility and looked around for fellow jumpers. I did not want any problems during any of my jumps, especially this night one. Prepare to land, I released my combat gear and started my final approach at jump school. The landing was a little tricky because we did not have any smoke on the ground to show us wind drift nor did we have any sergeant airborne’s on the ground telling us what to do. We were completely on our own tonight. I felt my rucksack hit the ground, tensed up my neck muscles, tucked my chin on my chest, raised my arms over my face and the balls of my feet hit the ground. A perfect PLF and I was very happy, but it was not over yet. Speed was of importance to my on this jump because of all the other three hundred paratroopers coming down on top of the drop zone in the next few minutes. I popped up to one knee and began securing my combat gear, loaded up and off the drop zone I went. I was the first jumper off the drop zone tonight. AIRBORNE!
We all landed and had MRE’s; I had beef pot roast this time. Then we had to take all our combat equipment apart and set it up for the next class. Tonight was our night to shake out parachutes. They have been piling up over the past three days. Chalks one thru four shook out 1267 parachutes. The toll was taken on our mental and physical readiness. The bummer was the formation tomorrow will be at 0800hrs. Not long for us to rest or anything else. I got to my room and showered put pizza rolls in the microwave. I crashed for one hour and thirty minutes.
PULL-UPS for the day: 20
Thursday, April 30, 2009

Wednesday, April 29, 2009
JUMPMASTER Inspection Sequence
For all of you out there that has been wondering what it takes to ensure that we have a safe jump. this is the information that the jumpmaster is tested on prior to being qualified as a jumpmaster.
Hollywood JMPI Sequence
ADVANCED COMBAT HELMET (FRONT):
The jumpmaster will place both hands on the right side of the ACH; fingers and thumbs extended and joined pointing skyward, palms facing the jumper. The left hand is the control hand; the right hand is the working hand. With the working hand trace across the rim of the ACH feeling for any sharp or protruding edges that may cut or damage the jumper’s static line upon exiting the aircraft. Once the hands are parallel place the thumbs on the rim of the ACH, tilt the jumpers head to the rear. Conduct a visual inspection to ensure the three suspension pads are present and the oval pads are covering the bolt ends.
Place the right index finger on the left adjustable buckle to ensure it is free of all cracked components and is serviceable, and the left adjustable strap is properly routed through it and the free running end is secured in the webbing retainer. Now trace the left adjustable strap down to the chinstrap fastener, to ensure it is free of all cracked components and properly secured. Now bypass the chinstrap fastener and trace the long portion chinstrap, under the jumpers chin to where it is sewn into the right adjustable strap to ensure it is not twisted, cut or frayed. Now trace the right adjustable strap up to the right adjustable buckle to ensure it is free of all cracked components and is serviceable, and the free running end is secured in the webbing retainer. With the right index finger trace the short portion chinstrap across the front of the jumper’s chin drop both hands.
CANOPY RELEASE ASSEMBLIES:
Then next item of equipment we will discuss is the canopy release assemblies. These are like items of equipment so either one can be inspected first, however, for this talk through, we will start with the canopy release assembly opposite the Universal Static Line. Since the Universal Static Line is routed over the jumper’s right shoulder, we will begin the inspection with the jumper’s left canopy release assembly. Look at the left canopy release assembly; tap it with the knuckles of the right hand one time to insure that it sounds solid. With the right hand turn the left canopy release assembly one-quarter turn out and re-look at it. Insure that it is properly assembled, has no cracked components and that it is free of all foreign matter. Now look at the right canopy release assembly and with the left hand, conduct the same inspection. If the static line is resting against either canopy release assembly, it must be moved out of the way so that it does not obstruct the jumpmaster’s view of the canopy release assemblies.
CHEST STRAP:
Simultaneously slide both hands down the main lift web until the little fingers make contact with either the D-rings. Look at the chest strap to insure that it has not been misrouted around the main lift web. Insert the right hand, fingers and thumb extended and joined, fingers pointed skyward, palm facing the jumpmaster from bottom to top behind the chest strap next to where it is sewn into the main lift web. Trace the chest strap across until the right hand is behind the ejector snap, insuring that the chest strap is not twisted, cut, or frayed. The ejector snap pad will not come between the right hand and the ejector snap. With the thumb of the right hand, press in on the activating lever of the ejector snap to insure that it is properly seated over the ball detent and is free of all foreign matter. Leave the right hand and thumb in place, and move to the right side of the jumper.
WAIST BAND:
Insert the left hand, fingers and thumb extended and joined fingers pointed skyward, palm facing the jumpmaster, from the bottom to the top behind the waistband next to where it sewn into the packtray. Look at the waistband where it is sewn into the packtray and insure that at least 50% of one row of stitching is present. Trace the waistband forward to insure that it is not twisted, cut, frayed or been misrouted behind the horizontal back strap. Trace the waistband forward until the left hand makes contact with the right D-ring. Look at the waistband to insure that it is routed over the right main lift web and under the right D-ring. Rotate the right hand down and grasp the top-carrying handle of the reserve parachute, palm facing the reserve. Simultaneously lift up and out on the reserve parachute and place the left hand, palm facing the jumper, into the jumper’s chest. Look at the waistband where it is routed behind the reserve parachute to insure that it is routed through both waistband retainers and it is not twisted, cut, or frayed. Withdraw the left hand from the jumper’s chest, reach under the right forearm, and insert the left hand into the left carrying handle of the reserve parachute, palm facing away from the reserve with the fingers spread. With the right hand, release the top carrying handle of the reserve parachute and move to the left side of the jumper. Insert the right hand, fingers and thumb extended and joined, fingers pointed skyward, palm facing the jumpmaster, from the bottom to top behind the waistband as close as possible to the left D-ring. Look at the waistband to insure that it is routed over the left main lift web and under the left D-ring. Trace the waistband back to the metal adjuster, insuring that it is not twisted, cut or frayed. Leave the right hand in place behind the metal adjuster. Remove the left hand from the left carrying handle of the reserve parachute and insert the index finger and middle finger of the left hand from top to bottom into the quick release formed by waistband. Insure that it is no more than three fingers, no less than two, and that it is not a false quick release. Remove the index finger and middle finger from the quick release and with the index finger and thumb of the left hand pinch off the free running end of the waistband where it comes out of the metal adjuster. Trace the free running end of the waistband until the fingers fall of the end, insuring it is not cut, torn, or frayed, and is easily accessible to the jumper. Reinsert the left hand into the left carrying handle of the reserve parachute with the palm facing away from the reserve and fingers spread. Look at the right hand and trace the waistband adjuster panel back to where it is sewn into the packtray insuring that it is not twisted, cut, frayed or been misrouted behind the horizontal back strap. Look at the waistband adjuster panel where it is sewn to the packtray and insure that at least 50% of one row of stitching is present. Drop both hands and move to the front of the jumper.
RESERVE (SLCP)
With the left hand grasp the top carrying handle of the reserve parachute, palm facing the reserve and lift up and out. Look at the left connector snap and with the index finger of the right hand, finger the left connector snap one time to insure that it is properly secured to the left D-ring, has spring tension, and has not been safetied. Grasp the top carrying handle of the reserve parachute with the right hand, palm facing the reserve and lift up and out. Look at the right connector snap and with the index finger of the left hand, finger the right connector snap one time to insure that it is properly secured to the D-ring, does not have spring tension, and has been safetied. To further insure that the right connector snap has been safetied, with the left index finger pull down and out on the safety wire and lanyard to insure that the safety wire has been routed through the drilled hole in the right connector snap. Insert the left index finger from the top to the bottom on the inside of the right connector snap to insure the safety wire has been bent down toward the ground.The jumpmaster will place his right hand on the left end panel of the reserve parachute, then form a knife cutting edge with his left hand, fingers and thumb extended and joined pointed down, palm facing the jumpmaster; and sweep one time from the jumper’s left to right behind the rip cord grip. Ensuring the top left and top right pack opening spring bands have not been misrouted over the ripcord grip. Form a fist with your left hand leaving the index finger exposed and insert it behind the ripcord grip retainer, ensuring that the ripcord grip is routed between the top panel and the rip cord grip retainer and not the ripcord retainer and the pile tape. Remove the left index finger and place it on the right steel swaged ball to ensure that it is present and against the ripcord grip and it is not cracked or corroded. With the index finger and thumb of your left hand pinch off the right cable where it emerges from the ripcord grip and trace it down until you come in contact with the locking pin, ensuring the cable is not kinked or frayed and it is properly routed over the pile tape. Continue to trace down the locking pin until you come to the end, ensuring the locking pin is not bent, cracked, or corroded. Leave your left index and thumb on the end of the right locking pin, and make a visual inspection of the red soft loop, to ensure it is not cut, frayed, burned or twisted and the locking pin is routed through it completely and not puncturing it. Place your right index finger on the left steel swaged ball and conduct the same inspection. Now place either hand on an end panel, and with the index finger and thumb of the other hand, pinch off the ripcord protector flap making a visual and physical inspection of the log record book to ensure that it is present. Close the ripcord protector flap and make a visual inspection to ensure a piece of ¼ inch yellow binding tape is permanently sewn across the top of the ripcord protector flap. With either hand feel for the bulge created by the deployment assistance device to ensure it is centered behind the ripcord protector flap. The pack opening spring bands must be inspected for exposed metal, spring tension, and proper routing. Form a knife edge with the left hand, fingers and thumb extended and joined, palm facing you the jumpmaster and sweep the top carrying handle and universal static line snap hook back toward the jumper, this will be control hand. Begin the inspection of the pack opening spring bands with the top right pack opening spring band. With the index finger and thumb of the right hand pinch off the tab portion of the top right pack opening spring band and pull it down toward the ripcord protector flap. Look at the pack opening spring band to insure that it is routed through the reinforced nylon webbing on the back of the reserve, it is properly routed under the top carrying handle, and there is no exposed metal on the pack opening spring band. When the tab portion of the pack opening spring band is released the pack opening spring band should pop back into place. Repeat the same inspection for the top left pack opening spring band. With the left hand, form a knife-edge, fingers and thumb extended and joined, palm facing you the jumpmaster, fingers pointing down and sweep the left carrying handle out of the way and inspect the left pack opening spring band. Place the control hand on the bottom right corner of the reserve parachute lifting it up and out, so that the bottom left and bottom right pack opening spring bands can be inspected in the same manner. Lower the reserve parachute back to its original position, leave the control hand on the bottom right corner of the reserve, and inspect the right pack opening spring band. An overall inspection of the reserve parachute must now be conducted to insure that it is free of grease, oil, dirt, mud, tears, and exposed canopy. Place both hands on the top right corner of the reserve parachute, palms facing the reserve. The left hand is the control hand and the right hand is the working hand. With the head and eyes 6 to 8 inches from the working hand trace across the top panel and down the left end panel. Move the control hand down to the bottom right corner of the reserve and lift the reserve parachute up and out, exposing the bottom panel, trace the bottom panel across until contact is made with the control hand. Lower the reserve parachute back to its original position, return the control hand to the top right corner. Flip the right hand over and trace up the right end panel until contact is made with the control hand. Raise the control hand up out of the way and trace across the top right corner where the control hand had been. Raise the reserve parachute to the jumper and issue the commands “hold, squat.”
LEG STRAPS:
Insert the index finger and middle finger of each hand from outside to inside under the leg straps behind the aviator’s kit bag where the natural pocket is formed. Simultaneously slide both hands rearward on the leg straps back to the saddle, insuring that the leg straps are not crossed. With the left hand trace the right leg strap up to the quick fit V-ring insuring that it is not twisted, cut, or frayed. With the thumb of the left hand press in on the activating lever of the right leg strap ejector snap to insure that it is properly seated over the ball detent and is free of all foreign matter. Leave the left hand in place and look at the left leg strap. With the right hand trace the left leg strap up to the quick fit V-ring insuring that it is not twisted, cut, or frayed and it is properly routed through the exposed carrying handle of the aviator’s kit bag, over the bottom and under the top. With the thumb or index finger of the right hand press in on the activating lever of the left leg strap ejector snap to insure that it is properly seated over the ball detent, and is free of all foreign matter. Look at the aviator’s kit bag to insure that it is present, not been reversed and the sewn re-enforced portion is facing away from the jumper. Tap the jumper on the thigh and issue the command “Recover.”
UNIVERSAL STATIC LINE:
Reach across your body with your right hand and grasp the Universal Static Line Snap Hook. Pull up on the universal static line snap hook to ensure it is that it is secured to the top carrying handle of the reserve parachute. Open the right hand and let the universal static line snap hook rest in the palm. Place the index finger of the left hand on the girth hitch of the universal static line. Insure the green marking stitching is present and the girth hitch is routed around the narrow portion of the universal static line snap hook. Place the index finger of the left hand near the rivet pin, to ensure it is secure and free of rust and corrosion. With the right hand, re-grasp the universal static line snap hook and hold it perpendicular to the reserve parachute with the opening gate facing toward the jumper. With the left hand, palm facing the jumper, thumb pointing downward, grasp the universal static line just above the universal static line snap hook. Rotate the universal static line down and to the jumper’s right and push it toward the universal static line snap hook. Inspect inside the girth hitch to insure it is free of all cuts frays and burns. With the index finger or thumb of the right hand push the girth hitch back towards the universal static line snap hook and again inspect inside the girth hitch for any cuts frays or burns. Redress the girth hitch down around the narrow portion of the universal static line snap hook and release the universal static line with the left hand. Since the static line is routed over the jumper’s right shoulder, with the index finger and thumb of the right hand, form an “O” around the universal static line just above the universal static line snap hook. Raise the right hand up simultaneously inspecting the static line as it passes through the “O” formed by the right hand to insure that it is free of all cuts, frays, and burns. When the right hand has been raised as high as it can go issue the jumper the command “turn.” Once the jumper has completed the turn, the right hand should have been raised high enough so as to pull all of the slack from the static line slack retainer. Keep the universal static line tight between the control hand and the first stow, place the index finger, or index finger and the middle finger of the working hand behind the universal static line below the control hand so there is skin to skin contact. Trace the universal static line down to the first stow insuring that it is free of all cuts, frays, and burns and it has not been misrouted under or through either riser assembly. With either hand, form a bite in the universal static line and look at the static line slack retainer. Insure the static line slack retainer it is not torn or frayed more than 50%, then insert the bight from top to bottom through the static line slack retainer and pull all excess universal static line through. Flip the bight on top of the packtray and place either hand on it. The hand that controls the bite becomes the control hand. With the index finger and thumb of working hand pinch off the first stow and pull it one or two inches toward the center of the packtray. Look behind the stow to insure that the universal static line has not been misrouted around the static line stow bar and it is free of cuts, frays, or burns. Release the first stow and let it pop back into place. Insert the index finger of the working hand from bottom to top behind the first strand of universal static line as close as possible to the first stow. Trace the first strand of universal static line over to the second stow to insure that it is free of all cuts, frays, and burns. Once contact is made with the second stow, pinch it off with the index finger and thumb of the working hand pull it one to two inches toward the center of the packtray and conduct the same inspection. Place the index finger or thumb of the working hand behind the second strand of static line and trace it away from you insuring it is not cut, frayed, or burned. Continue to inspect the universal static line in the same manner down to the pack opening loop insuring that you inspect the last strand of static line with the index finger only and the last strand of universal static line is routed from the right outer static line stow bar.
PACK OPENING LOOP, PACK CLOSING LOOPS, PACK CLOSING TIE:
Once contact is made with the pack-opening loop insure that it is situated between the pack closing loops at the 6 and 9 o’clock position. Insert the index finger of the working hand from bottom to top into the pack-opening loop. Pull down and out on the pack opening loop, look inside the pack opening loop to insure the pack closing tie has been routed through the pack opening loop and that the pack opening loop is not torn or frayed at all. Let the pack opening loop pop off your finger. Place the index finer of the working hand on the pack-closing loop at the six o’clock position. Look at the pack closing loop to insure the pack closing tie is routed through the pack closing loop and the pack closing loop is not torn or frayed more than 50%. Inspect the remaining pack closing loops in the same manner using a clockwise motion, 9 o’clock, 12 o’clock, 3 o’clock. Look at the pack closing tie and the surgeon’s knot locking knot. Insure the surgeon’s knot locking knot is properly positioned between the pack closing loops at the 3 o’clock and 6 o’clock position. Insert the index finger of working hand from bottom to top behind the surgeon’s knot locking knot and pull down and out, to ensure it is secure and that the pack closing tie has been properly constructed of one turn and one turn only of ¼ inch cotton webbing. Let the pack closing tie pop off the end of your finger, stand up directly behind the jumper and issue the command “tilt your head forward”.
ADVANCED COMBAT HELMET (REAR):
The jumpmaster places both hands on the left side of the ACH, fingers and thumbs extended and joined fingers pointing skyward, palms facing the jumper. The left hand is the control hand; the right hand is the working hand. With the working hand trace the rim of the ACH feeling for any sharp or protruding edges that may cut or damage the jumper’s static line upon exiting the aircraft. Once the hands are parallel place the thumbs on the rim of the ACH and tilt the jumper’s head forward. Conduct a visual inspection to ensure the oval pads are covering the bolt ends and the rear pad is protruding slightly past the rim of the ACH.
Place the right index finger on the right adjustable buckle to ensure the right adjustable strap is properly routed through it and free of all cracked components and is serviceable. Now trace the right adjustable strap down until contact is made with the long portion chinstrap to ensure it is not twisted cut or frayed. Leave the right index finger in place, now place the left index finger on the left adjustable buckle and conduct the same inspection. Leave the left index finger in place. Conduct a visual inspection of the nape pad to ensure it is present, secure, serviceable, and has not been reverse.
RISER ASSEMBLIES:
Reach as far forward over the jumper’s shoulders as possible and with each hand grasp a riser assembly just above the canopy release assemblies. Since these are like items of equipment, either riser assembly can be inspected first, however for this talk through we will begin the inspection with the left riser assembly. Give the left riser assembly a sharp tug to the rear. Open the left hand to form an “L”. Apply upward pressure with the left thumb and trace the riser assembly rearward to where it disappears into the main packtray, insuring it is not twisted, cut, torn, or frayed. Leave the left hand in place and with the right hand conduct the same inspection on the right riser assembly. You must insure a log record book is present in either riser assembly.
PACKTRAY:
An overall inspection of the packtray must be conducted to insure the packtray is free of grease, oil, dirt, mud, or tears. Place both hands on the top left corner of the packtray, palms facing the packtray. The left hand is the control hand and the right hand is the working hand. With the head and eyes 6 to 8 inches away from the working hand trace across the top pack closing flap, down the right pack closing flap, across the bottom pack closing flap, flip the right hand over and trace up the left pack closing flap. When the working hand makes contact with the control hand, raise the control hand out of the way and trace across the top left corner of the packtray where the control hand had been. Form knife-edges with both hands, palms facing the jumpmaster and issue the command “arch your back”.
DIAGONAL BACKSTRAPS:
Insert each hand under the X formed by the diagonal back straps. Look at the diagonal back straps to insure they have been properly routed over the appropriate shoulder, and that the top diagonal back strap has one more row of exposed stitching than the one on the bottom. Look at the diagonal back strap retainers to insure they are routed through the sizing channels on the diagonal back straps. The diagonal back strap retainers are routed around the diagonal back strap keepers and the pull the dot fasteners are secured. To further ensure the pull the dot fasteners are secure, with both thumbs, apply upward pressure on the pull the dot fasteners. Focus your attention on the left hand and the left side of your jumper. With the left hand, trace down the diagonal back strap to the back strap adjuster, insuring that it is not twisted, cut, or frayed. Grasp the back strap adjuster with the left hand and focus your attention on the right side of your jumper. With the right hand, trace down the diagonal back strap, insuring it is not twisted cut or frayed, bypass the back strap adjuster and pick up the inspection of the horizontal back strap.
HORIZONTAL BACKSTRAPS:
Trace the horizontal back strap down to where it disappears into the main lift web. Withdraw the right hand from under the horizontal back strap, and reinsert it, fingers and thumb extended and joined, fingers pointing skyward, palm facing the jumpmaster, from bottom to top behind the horizontal back strap where it reemerges from the main lift web and issue the jumper the command “bend forward at the waist”. Release the back strap adjuster with the left hand, reach across the packtray and grasp the center of the bottom pack-closing flap. With the head and eyes 6 to 8 inches from the working hand, trace the horizontal back strap across the jumper’s back insuring it is not twisted, cut, or frayed, and that the horizontal back strap is properly routed through both horizontal back strap retainers, and that the horizontal back strap retainers are routed around the horizontal back strap keeper, and the pull the dot fasteners are secured. Continue tracing the horizontal back strap to where it disappears into the main lift web on the left side of the jumper. With the left hand, palm facing skyward, re-grasp the back strap adjuster on the jumper’s left side. Withdraw the right hand from behind the horizontal back strap and reinsert it, fingers and thumb extended and joined, palm facing the jumpmaster, from top to bottom or bottom to top behind the horizontal back strap where it reemerges from the main lift web. Trace the horizontal back strap up to where contact is made with the control hand still in place on the back strap adjuster. Withdraw the right hand from behind the horizontal back strap and get left hip to left hip with the jumper.
SADDLE:
Place the finger tips of the right hand, fingers and thumb extended and joined, fingers pointed down, palm facing the jumper on the accessory attaching ring of the lowering line adapter web or the single “X” boxed stitch on the left main lift web. Trace the saddle across the jumpers buttocks insuring that the saddle is not twisted, cut, frayed, been inverted, or that either leg strap has been misrouted around the saddle. Trace the saddle until contact is made with the single “X” boxed stitch on the right main lift web. Reach back and get a hand full of air and issue the jumper that good seal of approval by tapping the jumper on the buttocks and issuing the command “recover”.
Hollywood JMPI Sequence
ADVANCED COMBAT HELMET (FRONT):
The jumpmaster will place both hands on the right side of the ACH; fingers and thumbs extended and joined pointing skyward, palms facing the jumper. The left hand is the control hand; the right hand is the working hand. With the working hand trace across the rim of the ACH feeling for any sharp or protruding edges that may cut or damage the jumper’s static line upon exiting the aircraft. Once the hands are parallel place the thumbs on the rim of the ACH, tilt the jumpers head to the rear. Conduct a visual inspection to ensure the three suspension pads are present and the oval pads are covering the bolt ends.
Place the right index finger on the left adjustable buckle to ensure it is free of all cracked components and is serviceable, and the left adjustable strap is properly routed through it and the free running end is secured in the webbing retainer. Now trace the left adjustable strap down to the chinstrap fastener, to ensure it is free of all cracked components and properly secured. Now bypass the chinstrap fastener and trace the long portion chinstrap, under the jumpers chin to where it is sewn into the right adjustable strap to ensure it is not twisted, cut or frayed. Now trace the right adjustable strap up to the right adjustable buckle to ensure it is free of all cracked components and is serviceable, and the free running end is secured in the webbing retainer. With the right index finger trace the short portion chinstrap across the front of the jumper’s chin drop both hands.
CANOPY RELEASE ASSEMBLIES:
Then next item of equipment we will discuss is the canopy release assemblies. These are like items of equipment so either one can be inspected first, however, for this talk through, we will start with the canopy release assembly opposite the Universal Static Line. Since the Universal Static Line is routed over the jumper’s right shoulder, we will begin the inspection with the jumper’s left canopy release assembly. Look at the left canopy release assembly; tap it with the knuckles of the right hand one time to insure that it sounds solid. With the right hand turn the left canopy release assembly one-quarter turn out and re-look at it. Insure that it is properly assembled, has no cracked components and that it is free of all foreign matter. Now look at the right canopy release assembly and with the left hand, conduct the same inspection. If the static line is resting against either canopy release assembly, it must be moved out of the way so that it does not obstruct the jumpmaster’s view of the canopy release assemblies.
CHEST STRAP:
Simultaneously slide both hands down the main lift web until the little fingers make contact with either the D-rings. Look at the chest strap to insure that it has not been misrouted around the main lift web. Insert the right hand, fingers and thumb extended and joined, fingers pointed skyward, palm facing the jumpmaster from bottom to top behind the chest strap next to where it is sewn into the main lift web. Trace the chest strap across until the right hand is behind the ejector snap, insuring that the chest strap is not twisted, cut, or frayed. The ejector snap pad will not come between the right hand and the ejector snap. With the thumb of the right hand, press in on the activating lever of the ejector snap to insure that it is properly seated over the ball detent and is free of all foreign matter. Leave the right hand and thumb in place, and move to the right side of the jumper.
WAIST BAND:
Insert the left hand, fingers and thumb extended and joined fingers pointed skyward, palm facing the jumpmaster, from the bottom to the top behind the waistband next to where it sewn into the packtray. Look at the waistband where it is sewn into the packtray and insure that at least 50% of one row of stitching is present. Trace the waistband forward to insure that it is not twisted, cut, frayed or been misrouted behind the horizontal back strap. Trace the waistband forward until the left hand makes contact with the right D-ring. Look at the waistband to insure that it is routed over the right main lift web and under the right D-ring. Rotate the right hand down and grasp the top-carrying handle of the reserve parachute, palm facing the reserve. Simultaneously lift up and out on the reserve parachute and place the left hand, palm facing the jumper, into the jumper’s chest. Look at the waistband where it is routed behind the reserve parachute to insure that it is routed through both waistband retainers and it is not twisted, cut, or frayed. Withdraw the left hand from the jumper’s chest, reach under the right forearm, and insert the left hand into the left carrying handle of the reserve parachute, palm facing away from the reserve with the fingers spread. With the right hand, release the top carrying handle of the reserve parachute and move to the left side of the jumper. Insert the right hand, fingers and thumb extended and joined, fingers pointed skyward, palm facing the jumpmaster, from the bottom to top behind the waistband as close as possible to the left D-ring. Look at the waistband to insure that it is routed over the left main lift web and under the left D-ring. Trace the waistband back to the metal adjuster, insuring that it is not twisted, cut or frayed. Leave the right hand in place behind the metal adjuster. Remove the left hand from the left carrying handle of the reserve parachute and insert the index finger and middle finger of the left hand from top to bottom into the quick release formed by waistband. Insure that it is no more than three fingers, no less than two, and that it is not a false quick release. Remove the index finger and middle finger from the quick release and with the index finger and thumb of the left hand pinch off the free running end of the waistband where it comes out of the metal adjuster. Trace the free running end of the waistband until the fingers fall of the end, insuring it is not cut, torn, or frayed, and is easily accessible to the jumper. Reinsert the left hand into the left carrying handle of the reserve parachute with the palm facing away from the reserve and fingers spread. Look at the right hand and trace the waistband adjuster panel back to where it is sewn into the packtray insuring that it is not twisted, cut, frayed or been misrouted behind the horizontal back strap. Look at the waistband adjuster panel where it is sewn to the packtray and insure that at least 50% of one row of stitching is present. Drop both hands and move to the front of the jumper.
RESERVE (SLCP)
With the left hand grasp the top carrying handle of the reserve parachute, palm facing the reserve and lift up and out. Look at the left connector snap and with the index finger of the right hand, finger the left connector snap one time to insure that it is properly secured to the left D-ring, has spring tension, and has not been safetied. Grasp the top carrying handle of the reserve parachute with the right hand, palm facing the reserve and lift up and out. Look at the right connector snap and with the index finger of the left hand, finger the right connector snap one time to insure that it is properly secured to the D-ring, does not have spring tension, and has been safetied. To further insure that the right connector snap has been safetied, with the left index finger pull down and out on the safety wire and lanyard to insure that the safety wire has been routed through the drilled hole in the right connector snap. Insert the left index finger from the top to the bottom on the inside of the right connector snap to insure the safety wire has been bent down toward the ground.The jumpmaster will place his right hand on the left end panel of the reserve parachute, then form a knife cutting edge with his left hand, fingers and thumb extended and joined pointed down, palm facing the jumpmaster; and sweep one time from the jumper’s left to right behind the rip cord grip. Ensuring the top left and top right pack opening spring bands have not been misrouted over the ripcord grip. Form a fist with your left hand leaving the index finger exposed and insert it behind the ripcord grip retainer, ensuring that the ripcord grip is routed between the top panel and the rip cord grip retainer and not the ripcord retainer and the pile tape. Remove the left index finger and place it on the right steel swaged ball to ensure that it is present and against the ripcord grip and it is not cracked or corroded. With the index finger and thumb of your left hand pinch off the right cable where it emerges from the ripcord grip and trace it down until you come in contact with the locking pin, ensuring the cable is not kinked or frayed and it is properly routed over the pile tape. Continue to trace down the locking pin until you come to the end, ensuring the locking pin is not bent, cracked, or corroded. Leave your left index and thumb on the end of the right locking pin, and make a visual inspection of the red soft loop, to ensure it is not cut, frayed, burned or twisted and the locking pin is routed through it completely and not puncturing it. Place your right index finger on the left steel swaged ball and conduct the same inspection. Now place either hand on an end panel, and with the index finger and thumb of the other hand, pinch off the ripcord protector flap making a visual and physical inspection of the log record book to ensure that it is present. Close the ripcord protector flap and make a visual inspection to ensure a piece of ¼ inch yellow binding tape is permanently sewn across the top of the ripcord protector flap. With either hand feel for the bulge created by the deployment assistance device to ensure it is centered behind the ripcord protector flap. The pack opening spring bands must be inspected for exposed metal, spring tension, and proper routing. Form a knife edge with the left hand, fingers and thumb extended and joined, palm facing you the jumpmaster and sweep the top carrying handle and universal static line snap hook back toward the jumper, this will be control hand. Begin the inspection of the pack opening spring bands with the top right pack opening spring band. With the index finger and thumb of the right hand pinch off the tab portion of the top right pack opening spring band and pull it down toward the ripcord protector flap. Look at the pack opening spring band to insure that it is routed through the reinforced nylon webbing on the back of the reserve, it is properly routed under the top carrying handle, and there is no exposed metal on the pack opening spring band. When the tab portion of the pack opening spring band is released the pack opening spring band should pop back into place. Repeat the same inspection for the top left pack opening spring band. With the left hand, form a knife-edge, fingers and thumb extended and joined, palm facing you the jumpmaster, fingers pointing down and sweep the left carrying handle out of the way and inspect the left pack opening spring band. Place the control hand on the bottom right corner of the reserve parachute lifting it up and out, so that the bottom left and bottom right pack opening spring bands can be inspected in the same manner. Lower the reserve parachute back to its original position, leave the control hand on the bottom right corner of the reserve, and inspect the right pack opening spring band. An overall inspection of the reserve parachute must now be conducted to insure that it is free of grease, oil, dirt, mud, tears, and exposed canopy. Place both hands on the top right corner of the reserve parachute, palms facing the reserve. The left hand is the control hand and the right hand is the working hand. With the head and eyes 6 to 8 inches from the working hand trace across the top panel and down the left end panel. Move the control hand down to the bottom right corner of the reserve and lift the reserve parachute up and out, exposing the bottom panel, trace the bottom panel across until contact is made with the control hand. Lower the reserve parachute back to its original position, return the control hand to the top right corner. Flip the right hand over and trace up the right end panel until contact is made with the control hand. Raise the control hand up out of the way and trace across the top right corner where the control hand had been. Raise the reserve parachute to the jumper and issue the commands “hold, squat.”
LEG STRAPS:
Insert the index finger and middle finger of each hand from outside to inside under the leg straps behind the aviator’s kit bag where the natural pocket is formed. Simultaneously slide both hands rearward on the leg straps back to the saddle, insuring that the leg straps are not crossed. With the left hand trace the right leg strap up to the quick fit V-ring insuring that it is not twisted, cut, or frayed. With the thumb of the left hand press in on the activating lever of the right leg strap ejector snap to insure that it is properly seated over the ball detent and is free of all foreign matter. Leave the left hand in place and look at the left leg strap. With the right hand trace the left leg strap up to the quick fit V-ring insuring that it is not twisted, cut, or frayed and it is properly routed through the exposed carrying handle of the aviator’s kit bag, over the bottom and under the top. With the thumb or index finger of the right hand press in on the activating lever of the left leg strap ejector snap to insure that it is properly seated over the ball detent, and is free of all foreign matter. Look at the aviator’s kit bag to insure that it is present, not been reversed and the sewn re-enforced portion is facing away from the jumper. Tap the jumper on the thigh and issue the command “Recover.”
UNIVERSAL STATIC LINE:
Reach across your body with your right hand and grasp the Universal Static Line Snap Hook. Pull up on the universal static line snap hook to ensure it is that it is secured to the top carrying handle of the reserve parachute. Open the right hand and let the universal static line snap hook rest in the palm. Place the index finger of the left hand on the girth hitch of the universal static line. Insure the green marking stitching is present and the girth hitch is routed around the narrow portion of the universal static line snap hook. Place the index finger of the left hand near the rivet pin, to ensure it is secure and free of rust and corrosion. With the right hand, re-grasp the universal static line snap hook and hold it perpendicular to the reserve parachute with the opening gate facing toward the jumper. With the left hand, palm facing the jumper, thumb pointing downward, grasp the universal static line just above the universal static line snap hook. Rotate the universal static line down and to the jumper’s right and push it toward the universal static line snap hook. Inspect inside the girth hitch to insure it is free of all cuts frays and burns. With the index finger or thumb of the right hand push the girth hitch back towards the universal static line snap hook and again inspect inside the girth hitch for any cuts frays or burns. Redress the girth hitch down around the narrow portion of the universal static line snap hook and release the universal static line with the left hand. Since the static line is routed over the jumper’s right shoulder, with the index finger and thumb of the right hand, form an “O” around the universal static line just above the universal static line snap hook. Raise the right hand up simultaneously inspecting the static line as it passes through the “O” formed by the right hand to insure that it is free of all cuts, frays, and burns. When the right hand has been raised as high as it can go issue the jumper the command “turn.” Once the jumper has completed the turn, the right hand should have been raised high enough so as to pull all of the slack from the static line slack retainer. Keep the universal static line tight between the control hand and the first stow, place the index finger, or index finger and the middle finger of the working hand behind the universal static line below the control hand so there is skin to skin contact. Trace the universal static line down to the first stow insuring that it is free of all cuts, frays, and burns and it has not been misrouted under or through either riser assembly. With either hand, form a bite in the universal static line and look at the static line slack retainer. Insure the static line slack retainer it is not torn or frayed more than 50%, then insert the bight from top to bottom through the static line slack retainer and pull all excess universal static line through. Flip the bight on top of the packtray and place either hand on it. The hand that controls the bite becomes the control hand. With the index finger and thumb of working hand pinch off the first stow and pull it one or two inches toward the center of the packtray. Look behind the stow to insure that the universal static line has not been misrouted around the static line stow bar and it is free of cuts, frays, or burns. Release the first stow and let it pop back into place. Insert the index finger of the working hand from bottom to top behind the first strand of universal static line as close as possible to the first stow. Trace the first strand of universal static line over to the second stow to insure that it is free of all cuts, frays, and burns. Once contact is made with the second stow, pinch it off with the index finger and thumb of the working hand pull it one to two inches toward the center of the packtray and conduct the same inspection. Place the index finger or thumb of the working hand behind the second strand of static line and trace it away from you insuring it is not cut, frayed, or burned. Continue to inspect the universal static line in the same manner down to the pack opening loop insuring that you inspect the last strand of static line with the index finger only and the last strand of universal static line is routed from the right outer static line stow bar.
PACK OPENING LOOP, PACK CLOSING LOOPS, PACK CLOSING TIE:
Once contact is made with the pack-opening loop insure that it is situated between the pack closing loops at the 6 and 9 o’clock position. Insert the index finger of the working hand from bottom to top into the pack-opening loop. Pull down and out on the pack opening loop, look inside the pack opening loop to insure the pack closing tie has been routed through the pack opening loop and that the pack opening loop is not torn or frayed at all. Let the pack opening loop pop off your finger. Place the index finer of the working hand on the pack-closing loop at the six o’clock position. Look at the pack closing loop to insure the pack closing tie is routed through the pack closing loop and the pack closing loop is not torn or frayed more than 50%. Inspect the remaining pack closing loops in the same manner using a clockwise motion, 9 o’clock, 12 o’clock, 3 o’clock. Look at the pack closing tie and the surgeon’s knot locking knot. Insure the surgeon’s knot locking knot is properly positioned between the pack closing loops at the 3 o’clock and 6 o’clock position. Insert the index finger of working hand from bottom to top behind the surgeon’s knot locking knot and pull down and out, to ensure it is secure and that the pack closing tie has been properly constructed of one turn and one turn only of ¼ inch cotton webbing. Let the pack closing tie pop off the end of your finger, stand up directly behind the jumper and issue the command “tilt your head forward”.
ADVANCED COMBAT HELMET (REAR):
The jumpmaster places both hands on the left side of the ACH, fingers and thumbs extended and joined fingers pointing skyward, palms facing the jumper. The left hand is the control hand; the right hand is the working hand. With the working hand trace the rim of the ACH feeling for any sharp or protruding edges that may cut or damage the jumper’s static line upon exiting the aircraft. Once the hands are parallel place the thumbs on the rim of the ACH and tilt the jumper’s head forward. Conduct a visual inspection to ensure the oval pads are covering the bolt ends and the rear pad is protruding slightly past the rim of the ACH.
Place the right index finger on the right adjustable buckle to ensure the right adjustable strap is properly routed through it and free of all cracked components and is serviceable. Now trace the right adjustable strap down until contact is made with the long portion chinstrap to ensure it is not twisted cut or frayed. Leave the right index finger in place, now place the left index finger on the left adjustable buckle and conduct the same inspection. Leave the left index finger in place. Conduct a visual inspection of the nape pad to ensure it is present, secure, serviceable, and has not been reverse.
RISER ASSEMBLIES:
Reach as far forward over the jumper’s shoulders as possible and with each hand grasp a riser assembly just above the canopy release assemblies. Since these are like items of equipment, either riser assembly can be inspected first, however for this talk through we will begin the inspection with the left riser assembly. Give the left riser assembly a sharp tug to the rear. Open the left hand to form an “L”. Apply upward pressure with the left thumb and trace the riser assembly rearward to where it disappears into the main packtray, insuring it is not twisted, cut, torn, or frayed. Leave the left hand in place and with the right hand conduct the same inspection on the right riser assembly. You must insure a log record book is present in either riser assembly.
PACKTRAY:
An overall inspection of the packtray must be conducted to insure the packtray is free of grease, oil, dirt, mud, or tears. Place both hands on the top left corner of the packtray, palms facing the packtray. The left hand is the control hand and the right hand is the working hand. With the head and eyes 6 to 8 inches away from the working hand trace across the top pack closing flap, down the right pack closing flap, across the bottom pack closing flap, flip the right hand over and trace up the left pack closing flap. When the working hand makes contact with the control hand, raise the control hand out of the way and trace across the top left corner of the packtray where the control hand had been. Form knife-edges with both hands, palms facing the jumpmaster and issue the command “arch your back”.
DIAGONAL BACKSTRAPS:
Insert each hand under the X formed by the diagonal back straps. Look at the diagonal back straps to insure they have been properly routed over the appropriate shoulder, and that the top diagonal back strap has one more row of exposed stitching than the one on the bottom. Look at the diagonal back strap retainers to insure they are routed through the sizing channels on the diagonal back straps. The diagonal back strap retainers are routed around the diagonal back strap keepers and the pull the dot fasteners are secured. To further ensure the pull the dot fasteners are secure, with both thumbs, apply upward pressure on the pull the dot fasteners. Focus your attention on the left hand and the left side of your jumper. With the left hand, trace down the diagonal back strap to the back strap adjuster, insuring that it is not twisted, cut, or frayed. Grasp the back strap adjuster with the left hand and focus your attention on the right side of your jumper. With the right hand, trace down the diagonal back strap, insuring it is not twisted cut or frayed, bypass the back strap adjuster and pick up the inspection of the horizontal back strap.
HORIZONTAL BACKSTRAPS:
Trace the horizontal back strap down to where it disappears into the main lift web. Withdraw the right hand from under the horizontal back strap, and reinsert it, fingers and thumb extended and joined, fingers pointing skyward, palm facing the jumpmaster, from bottom to top behind the horizontal back strap where it reemerges from the main lift web and issue the jumper the command “bend forward at the waist”. Release the back strap adjuster with the left hand, reach across the packtray and grasp the center of the bottom pack-closing flap. With the head and eyes 6 to 8 inches from the working hand, trace the horizontal back strap across the jumper’s back insuring it is not twisted, cut, or frayed, and that the horizontal back strap is properly routed through both horizontal back strap retainers, and that the horizontal back strap retainers are routed around the horizontal back strap keeper, and the pull the dot fasteners are secured. Continue tracing the horizontal back strap to where it disappears into the main lift web on the left side of the jumper. With the left hand, palm facing skyward, re-grasp the back strap adjuster on the jumper’s left side. Withdraw the right hand from behind the horizontal back strap and reinsert it, fingers and thumb extended and joined, palm facing the jumpmaster, from top to bottom or bottom to top behind the horizontal back strap where it reemerges from the main lift web. Trace the horizontal back strap up to where contact is made with the control hand still in place on the back strap adjuster. Withdraw the right hand from behind the horizontal back strap and get left hip to left hip with the jumper.
SADDLE:
Place the finger tips of the right hand, fingers and thumb extended and joined, fingers pointed down, palm facing the jumper on the accessory attaching ring of the lowering line adapter web or the single “X” boxed stitch on the left main lift web. Trace the saddle across the jumpers buttocks insuring that the saddle is not twisted, cut, frayed, been inverted, or that either leg strap has been misrouted around the saddle. Trace the saddle until contact is made with the single “X” boxed stitch on the right main lift web. Reach back and get a hand full of air and issue the jumper that good seal of approval by tapping the jumper on the buttocks and issuing the command “recover”.
Tuesday, April 28, 2009
Day: April 28, 2009
Day: April 28, 2009 JUMP DAY #2
Weather report: mid-80’s today, humidity 44% wind 10-15 SE
The second day of jumps started this morning at 0230hrs with my alarm clock blaring. I got up shaved and drank a Gatorade and headed to formation. Formation was a 0350hrs for manifest and roll call. We then headed out to the PIT to do our pre-jump briefs and malfunction refresher, PLF’s and move out. Back down the hill to the harness shed and jumped out of the mock doors for a refresher and breakfast. MRE’s again of course, I ended up with chili mac and down it pretty quickly. We only had a few minutes to eat and go back into the harness shed. We headed out to get our reserves and parachutes to return and set them up for buddy rigging. A quick ten minute break and back into the harness shed for JMPI and sitting on our fourth point of contact.
The difference with our first jump of the day was were jumped full combat equipment and had to put an extra 45lbs on our bodies. It was a lot of weight on our shoulder and pretty difficult to walk. We made it though! Out the door and waddled to the aircraft, through the jet blast, propeller wash, and up the ramp at 1045hrs. Slowly this time! They stacked us in the C-130 like sardines. It was nuts. I was happy to see the first thirty jumpers leave the aircraft so we could spread out and move around a little. The next pass and we were out the door. At the three-thousand count; my chute was above me and I was headed for the leading edge of the drop zone, this was prefect. I began to observe my area and get ready to lower my combat equipment. At about two hundred feet I release my ruck sack down the 15’ lowering line. I untied my M-1950 weapons case and hit the quick release on it, it slid down to my chute and I was preparing to land. At 100’ I pulled a rear slip and contact, I performed a front right PLF, released my canopy, slid out of my harness and started through my tactical process of recovering my gear. First pull your equipment to you, next take the adjusting straps off the harness and the quick release off the harness. Attach them to your belt loops and pull your canopy to you and stuff them into the aviator’s kit bag. The next step is to put on your ruck sack, place the reserve over your head with the aviator’s kit bag facing to the rear and your parachute on the front side. Place the weapons carrying case on top of the kit bag, conduct a 360 degree view of your area to ensure that you have not left anything and head to the assembly area. Everyone in my chalk made it just fine. There were a few jumpers that had some problems. One female broke her forearm, another soldier broke a leg, and several had rolled or twisted ankles. I found out this morning that a soldier broke his leg and ankle on a jump yesterday and had to have surgery on it this morning. I don’t have any additional information on that at this time.
Lunch time! Guess what MRE’s and we did not have time to eat them. Get your gear and get on the buses we have to get this jump in before the winds pick-up. Someone picked up my reserve will I was in the latrine and I had to wait for everyone to pick up one. The guy from the other chalk had two. Of course one of them was mine. My jump team had already got on a bus and headed back. I caught a ride back with the first chalk and had to hurry to catch up with my chalk. They were on a break when I arrived. I had to put my combat equipment back together, get a new chute, and have my reserve chute inspected. Finally, I got to take a break with the first chalk and then got back in rhythm with my chalk. We put on our new chutes and here comes the Jumpmasters. The JMPI and sit down, watch the move again, and load the planes again at 1445hrs. This time we had an objective when we landing. We had a role play today similar to the invasion of Normandy; this was one of the greatest airborne operations in history. Chalks one thru four had to secure the south most end of the drop zone and set-up blocking points on three intersections. We preformed with precision. The senior NCOs’ took charge and made it happen. It was an amazing operation! We cleared the objectives and headed back to the assembly area. Dinner, MRE’s I had the roast beef this time and was starving. It was great! We had time to sit down and drink water, a lot of water and I needed it. It was hot and muggy and we had walked over two miles in a tactical formation. Secured our area and walked another two miles to the assembly area. This was real world training and I loved every minute of it. We waited on the buses to come get us and take us back to the harness shed. My platoon was scheduled to shack out chutes today but got changed to tomorrow. We were surprised and happy. They released us at 1845hrs. Formation tomorrow will be at 1400hrs in our normal training uniform.
Tomorrow will be a night full combat jump and our final jump here. All we need to do it exit the aircraft and we graduate on Friday and will be AIRBORNE qualified. No more running all over Ft. Benning, GA. We can walk with pride because we will not be dirty nasty legs (no airborne qualified personal). What a wonderful day Friday is going to be. Silver Wings on my chest and on the way home to see my wonderful family and hug my children.
The C-130 is the most amazing place I have ever been with Airborne personal. It is a flying Chapel. There is more praying and asking GOD for help, forgiveness, and peace. I do it too! I thank GOD everyday for all the things I am so blessed to have and for walking with me and stepping off the C-130 and being there on the drop zone when I land. He is my rock and my strength, this is all for his glory and honor! May I be able to be a witness and a leader for HIM.
PULL-UPS for the day: 20
Weather report: mid-80’s today, humidity 44% wind 10-15 SE
The second day of jumps started this morning at 0230hrs with my alarm clock blaring. I got up shaved and drank a Gatorade and headed to formation. Formation was a 0350hrs for manifest and roll call. We then headed out to the PIT to do our pre-jump briefs and malfunction refresher, PLF’s and move out. Back down the hill to the harness shed and jumped out of the mock doors for a refresher and breakfast. MRE’s again of course, I ended up with chili mac and down it pretty quickly. We only had a few minutes to eat and go back into the harness shed. We headed out to get our reserves and parachutes to return and set them up for buddy rigging. A quick ten minute break and back into the harness shed for JMPI and sitting on our fourth point of contact.
The difference with our first jump of the day was were jumped full combat equipment and had to put an extra 45lbs on our bodies. It was a lot of weight on our shoulder and pretty difficult to walk. We made it though! Out the door and waddled to the aircraft, through the jet blast, propeller wash, and up the ramp at 1045hrs. Slowly this time! They stacked us in the C-130 like sardines. It was nuts. I was happy to see the first thirty jumpers leave the aircraft so we could spread out and move around a little. The next pass and we were out the door. At the three-thousand count; my chute was above me and I was headed for the leading edge of the drop zone, this was prefect. I began to observe my area and get ready to lower my combat equipment. At about two hundred feet I release my ruck sack down the 15’ lowering line. I untied my M-1950 weapons case and hit the quick release on it, it slid down to my chute and I was preparing to land. At 100’ I pulled a rear slip and contact, I performed a front right PLF, released my canopy, slid out of my harness and started through my tactical process of recovering my gear. First pull your equipment to you, next take the adjusting straps off the harness and the quick release off the harness. Attach them to your belt loops and pull your canopy to you and stuff them into the aviator’s kit bag. The next step is to put on your ruck sack, place the reserve over your head with the aviator’s kit bag facing to the rear and your parachute on the front side. Place the weapons carrying case on top of the kit bag, conduct a 360 degree view of your area to ensure that you have not left anything and head to the assembly area. Everyone in my chalk made it just fine. There were a few jumpers that had some problems. One female broke her forearm, another soldier broke a leg, and several had rolled or twisted ankles. I found out this morning that a soldier broke his leg and ankle on a jump yesterday and had to have surgery on it this morning. I don’t have any additional information on that at this time.
Lunch time! Guess what MRE’s and we did not have time to eat them. Get your gear and get on the buses we have to get this jump in before the winds pick-up. Someone picked up my reserve will I was in the latrine and I had to wait for everyone to pick up one. The guy from the other chalk had two. Of course one of them was mine. My jump team had already got on a bus and headed back. I caught a ride back with the first chalk and had to hurry to catch up with my chalk. They were on a break when I arrived. I had to put my combat equipment back together, get a new chute, and have my reserve chute inspected. Finally, I got to take a break with the first chalk and then got back in rhythm with my chalk. We put on our new chutes and here comes the Jumpmasters. The JMPI and sit down, watch the move again, and load the planes again at 1445hrs. This time we had an objective when we landing. We had a role play today similar to the invasion of Normandy; this was one of the greatest airborne operations in history. Chalks one thru four had to secure the south most end of the drop zone and set-up blocking points on three intersections. We preformed with precision. The senior NCOs’ took charge and made it happen. It was an amazing operation! We cleared the objectives and headed back to the assembly area. Dinner, MRE’s I had the roast beef this time and was starving. It was great! We had time to sit down and drink water, a lot of water and I needed it. It was hot and muggy and we had walked over two miles in a tactical formation. Secured our area and walked another two miles to the assembly area. This was real world training and I loved every minute of it. We waited on the buses to come get us and take us back to the harness shed. My platoon was scheduled to shack out chutes today but got changed to tomorrow. We were surprised and happy. They released us at 1845hrs. Formation tomorrow will be at 1400hrs in our normal training uniform.
Tomorrow will be a night full combat jump and our final jump here. All we need to do it exit the aircraft and we graduate on Friday and will be AIRBORNE qualified. No more running all over Ft. Benning, GA. We can walk with pride because we will not be dirty nasty legs (no airborne qualified personal). What a wonderful day Friday is going to be. Silver Wings on my chest and on the way home to see my wonderful family and hug my children.
The C-130 is the most amazing place I have ever been with Airborne personal. It is a flying Chapel. There is more praying and asking GOD for help, forgiveness, and peace. I do it too! I thank GOD everyday for all the things I am so blessed to have and for walking with me and stepping off the C-130 and being there on the drop zone when I land. He is my rock and my strength, this is all for his glory and honor! May I be able to be a witness and a leader for HIM.
PULL-UPS for the day: 20
Monday, April 27, 2009
Day: April 27, 2009
Day: April 27, 2009 JUMP DAY
Weather report: mid-80’s today, humidity 40% wind 10 SSE
This morning was an early one. I started at 0245hrs with my alarm clock blaring and my day began. I had two Brown Sugar Cinnamon Pop Tarts with a canteen of water and headed out for formation. Formation and manifest call for the jumps. We were counted and recounted several times. It was crazy but called for. We then headed for the PIT. At the PIT everyone in the Company had to perform a proper front, left, right, and rear PLF to move to the harness shed. After everyone had successfully completed the exercise we ran one mile to the harness. I thought it was crazy to make us run that far before a jump but found out that it helps loosen you up and gives the instructors of personal that may have injuries.
In formation at the harness shed and MRE’s for breakfast. I had the beef stew one for breakfast. Now on your feet and inside the harness shed. We finally got in the harness shed at 0700hrs and the HURRY-UP and WAIT began. We had another accountability check and then moved out by our new chalks to acquire our parachute harness and reserve chute. We placed our arm thru the harness straps with our right arms and placed our right hand on our helmet. We carried our reserve in our left hand by the reserve carrying handle located on the top. When we returned to the harness shed we were back in roster order number and standing by our bench. The orders were to disconnect all the attachments and fully extend them, fold the aviator kit bag, and place the reserve on the top of the bench with the rip cord grip facing away from you. Once that is completed you are on a ten minute break. After the break we were instructed to size our parachute to fit our body. This is done by unsnapping the buttons on the back of the parachute tray and moving it into another hole. You do this one strap at a time to avoid twisted our rerouting the back straps. There are five slots available for adjustment. The very bottom one is the largest adjustment; then you move up to size four, size three, size two, and small. My chute harness fits me best in size three. I think that the majority of the Company is a size three. We did the buddy rigging again, but this time it was for real. We were very careful with ensuring everything was properly hooked-up and routed to ensure we were safe. Then the fun started. JMPI!
Jumpmaster Pre-jump Inspection! We had jumpmasters all over the place. The demonstration was dead on the money, just like everything else here at the school. The jumpmasters went through each and every member of the Company and initialed our helmets after they had completed the task. We were instructed to sit down and place our right hand on the rip cord grip and not to touch anything. After about an hour of sitting there we were allowed to stand up and adjust our leg straps and anything else that needed to be adjusted. At this time the jumpmasters conducted a front and rear inspection. This is the final check before loading the aircraft. Then the waiting continued.
After some shouting over the intercom a movie started to play on the TV’s in the harness shed. The movie was the MACON brief. This explains the demotions of the drop zone, any possible hazards, or hazard areas. Soon after the planes fired up and started rolling toward the harness shed. They started loading the aircraft at 1000hrs and started with chalk 12 and 11. I am in chalk three so I waited a long time. Each time one of the two C-130’s from the Air National Guard would roll-up two chalks would get up and leave. The two planes were from Alaska and West Virginia. Pretty soon it was my time. My chalk stood up and headed by two’s to the aircraft. My first jump was going to be out of the left door. That means we exit the left rear door facing the back of the aircraft.
The doors rolled up and the plane turned to approach the loading area. We started towards the rear of the aircraft to load up the ramp at 1230hrs. When we started to approach the heat from the engines and the JP 8 aircraft fuel, along with the jet was propelled us backward and made us dig down and lean into the draft to load. We moved toward the nose of the aircraft and set in the cargo seats. Not in the netting they actually had the seats in the aircraft. This was a first for me, every C-130 I have ever been on one had the cargo netting for seats. Lift off, we were airborne and the only way off the plane was through a door on the side. The sounds rand out, TEN MINUTES! It was almost time to go. The jumpmasters continued, GET READY. I was in the second pass so I watched as all my new friends performed the drill and prepared to exit the aircraft. OUT BOARD PERSONAL, STAND-UP! INBOARD PERSONAL, STAND-UP! It was getting close. HOOK-UP! This means go time, no turning back now. CHECK STATIC LINE! Trace down from the point of attachment, four in the hand, two below, and trace it to your shoulder, then trace it from the jumper in front of you down their shoulder into the first loop, and hit them on the helmet and sound off with, SAFE. CHECK EQUIPMENT! Our little jingle, Helmet, Chin Strap, Chest Strap, Left and Right Leg Strap, at each point of the jingle you touch the piece of equipment and ensure that you have everything completely closed and that nothing has come loose during movement to and on the aircraft. SOUND OFF FOR EQUIPMENT CHECK! A slap will start at the back of the jump stick and each jumper will slap the person in front of him on the fourth of contact (buttock) and send it up the line until it reaches the jumpmaster. The jumper in the door position will sound off with, ALL O.K. JUMPMASTER! Then the nerves started kicking in for some of the jumpers. ONE MINUTE! THIRTY-SECONDS! STANDY-BY! The jumpmasters are waiting on the green light. It flashes and with a smack on the number one jumpers’ buttock he disappeared out the door. A flash of daylight and then another one left the aircraft, then another, until they were all gone. All that was left swinging in the air was the static line that pulled their chutes open. The plane turned and headed back around for the next pass. It was my turn to exit now. The process started over. At first, this morning I thought about things and wondered what would happen if my chute didn’t open and my reserve failed. The things that come to mind before you exit an aircraft. I prayed about it last night and this morning and had peace like I have never felt before. I was not nervous at all and was a comfort to some of my fellow jumpers. It was amazing to follow the commands and get ready to exit the C-130 in fight for the first time. THIRTY-SECONDS! The time was here. My chalk began to move out the door, I was number seven. I handed off my static line and pushed hard and out the door I went. WOOSH! I forgot to start counting. So did everyone else I talked to on the ground. At first I felt the heat of the jet blast and then the wind, I saw my feet, the rear of the plane go by and then a sharp smooth tug above me. A beautiful silk green mushroom was above me. My parachute opened and I had no twists or any malfunctions. The wind picked-up and I started drifting to the edge of the drop-zone. While I was floating at 1200’ it was so peaceful, no sound at all, until I heard the jumpmasters on the ground yelling at us to pull the correct slip. I was drifting towards the trees. They were only six to ten feet high, but they were still trees. I pulled as much rear left diagonal slip as I could and my feet hit the ground. I did my PLF on the dirt road next to the tree line. My parachute covered four small long needle white pine trees on the west side of the DZ. I had made it, now it was time for me to recover my parachute. I was pulling on static lines, bending the small trees over and finally secured my canopy from the tree line. My buddy drifted way off into the trees and I didn’t see him until we got back to the assembly area. I reported it to the Blackhat’s as soon as one came by to check on me. They went and picked him up.
At the assembly area we had an MRE for lunch, this time it was Cheese Manicotti. Not bad at all. I was starving, anything would have been good. We put our chutes into the back of a tractor trailer and got on a bus back to the harness shed.
At the harness shed we had our reserves checked and got a new parachute. Back to the benches to gear up for the next jump. The other chalks that left the assembly area before us were already JMPI’d and ready for the bird. We started the buddy rigging again. JMPI, sit watch the video again, front and rear check, and get ready to go again. It was 1550hrs when my bird came to throw me out again. On the aircraft much of the same but this time we switched doors. I was to exit out of the right door and was the number three man. The guy in front of me had been real nervous and acting funny, he said that he was fine. All the commands went off without a problem. We started to the door and he stopped after the first person jumped and stutter stepped and caused me to get out of rhythm. I jumped and began to twist in air. This is not a problem, but it kind of a wild ride. I counted this time and got to three thousand and that wonderful tug on the shoulders, my parachute blossomed open nice and round. I had about eight twists and was wound up like a kid on a swing in the yard. I checked my canopy and it was good, and then began the process to correct my risers. I reached back behind my head pulled down and out on the risers and began bicycling my feet. This motion made me start to spin and the twists came right out. Now it was time to prepare to land again. I found myself drifting and was able to correct my drift and land almost center of the drop zone. It was a prefect PLF and I quickly gathered my gear and started to move out when Petty Officer First Class Pierce started down. I went to a knee and waited for him to land. A PLF and he was on the ground, the wind gusted and began to drag him down the drop zone. I yelled at him to activate a canopy release and he did. It continued to drag him. I ran a jumped on the partially deflated the chute and it died down. I then checked on the Petty Officer. We was grateful, it had pulled him over twelve feet and would have continued to drag him unless someone helped him out. He had dirt all over him and this fine powdery dust here made him look like a cinnamon coated sailor. We gathered hi gear a headed for the assembly area. On the way two soldiers collided in air and their parachutes collapsed. They followed all the proper steps, activated their reserves and made a successful landing. We all made it through jumps one and two. A few rolled or twisted ankles from improper landing procedures, but nothing else at this time. GOD was with each of us today and I thank him for all that HE does for us and will continue to do!
It is time for me to get to bed and try and get some rest. Formation will be at 0350hrs in the morning and we will conduct a combat jump in the morning starting at 1000hrs followed by another jump starting at 1500hrs. It will be an extremely long day tomorrow. We must get all the parachutes that the company has jumped out and shake the chutes out. This is done to help the riggers fold and put the chutes back in the harness pack trays. We will be out in the harness area until at least 2200hrs tomorrow night. The good thing we will be able to sleep the following the morning and formation will be at 1300hrs on Wednesday.
Enough for now, more adventure tomorrow.
PULL-UPS for the day: 20
Weather report: mid-80’s today, humidity 40% wind 10 SSE
This morning was an early one. I started at 0245hrs with my alarm clock blaring and my day began. I had two Brown Sugar Cinnamon Pop Tarts with a canteen of water and headed out for formation. Formation and manifest call for the jumps. We were counted and recounted several times. It was crazy but called for. We then headed for the PIT. At the PIT everyone in the Company had to perform a proper front, left, right, and rear PLF to move to the harness shed. After everyone had successfully completed the exercise we ran one mile to the harness. I thought it was crazy to make us run that far before a jump but found out that it helps loosen you up and gives the instructors of personal that may have injuries.
In formation at the harness shed and MRE’s for breakfast. I had the beef stew one for breakfast. Now on your feet and inside the harness shed. We finally got in the harness shed at 0700hrs and the HURRY-UP and WAIT began. We had another accountability check and then moved out by our new chalks to acquire our parachute harness and reserve chute. We placed our arm thru the harness straps with our right arms and placed our right hand on our helmet. We carried our reserve in our left hand by the reserve carrying handle located on the top. When we returned to the harness shed we were back in roster order number and standing by our bench. The orders were to disconnect all the attachments and fully extend them, fold the aviator kit bag, and place the reserve on the top of the bench with the rip cord grip facing away from you. Once that is completed you are on a ten minute break. After the break we were instructed to size our parachute to fit our body. This is done by unsnapping the buttons on the back of the parachute tray and moving it into another hole. You do this one strap at a time to avoid twisted our rerouting the back straps. There are five slots available for adjustment. The very bottom one is the largest adjustment; then you move up to size four, size three, size two, and small. My chute harness fits me best in size three. I think that the majority of the Company is a size three. We did the buddy rigging again, but this time it was for real. We were very careful with ensuring everything was properly hooked-up and routed to ensure we were safe. Then the fun started. JMPI!
Jumpmaster Pre-jump Inspection! We had jumpmasters all over the place. The demonstration was dead on the money, just like everything else here at the school. The jumpmasters went through each and every member of the Company and initialed our helmets after they had completed the task. We were instructed to sit down and place our right hand on the rip cord grip and not to touch anything. After about an hour of sitting there we were allowed to stand up and adjust our leg straps and anything else that needed to be adjusted. At this time the jumpmasters conducted a front and rear inspection. This is the final check before loading the aircraft. Then the waiting continued.
After some shouting over the intercom a movie started to play on the TV’s in the harness shed. The movie was the MACON brief. This explains the demotions of the drop zone, any possible hazards, or hazard areas. Soon after the planes fired up and started rolling toward the harness shed. They started loading the aircraft at 1000hrs and started with chalk 12 and 11. I am in chalk three so I waited a long time. Each time one of the two C-130’s from the Air National Guard would roll-up two chalks would get up and leave. The two planes were from Alaska and West Virginia. Pretty soon it was my time. My chalk stood up and headed by two’s to the aircraft. My first jump was going to be out of the left door. That means we exit the left rear door facing the back of the aircraft.
The doors rolled up and the plane turned to approach the loading area. We started towards the rear of the aircraft to load up the ramp at 1230hrs. When we started to approach the heat from the engines and the JP 8 aircraft fuel, along with the jet was propelled us backward and made us dig down and lean into the draft to load. We moved toward the nose of the aircraft and set in the cargo seats. Not in the netting they actually had the seats in the aircraft. This was a first for me, every C-130 I have ever been on one had the cargo netting for seats. Lift off, we were airborne and the only way off the plane was through a door on the side. The sounds rand out, TEN MINUTES! It was almost time to go. The jumpmasters continued, GET READY. I was in the second pass so I watched as all my new friends performed the drill and prepared to exit the aircraft. OUT BOARD PERSONAL, STAND-UP! INBOARD PERSONAL, STAND-UP! It was getting close. HOOK-UP! This means go time, no turning back now. CHECK STATIC LINE! Trace down from the point of attachment, four in the hand, two below, and trace it to your shoulder, then trace it from the jumper in front of you down their shoulder into the first loop, and hit them on the helmet and sound off with, SAFE. CHECK EQUIPMENT! Our little jingle, Helmet, Chin Strap, Chest Strap, Left and Right Leg Strap, at each point of the jingle you touch the piece of equipment and ensure that you have everything completely closed and that nothing has come loose during movement to and on the aircraft. SOUND OFF FOR EQUIPMENT CHECK! A slap will start at the back of the jump stick and each jumper will slap the person in front of him on the fourth of contact (buttock) and send it up the line until it reaches the jumpmaster. The jumper in the door position will sound off with, ALL O.K. JUMPMASTER! Then the nerves started kicking in for some of the jumpers. ONE MINUTE! THIRTY-SECONDS! STANDY-BY! The jumpmasters are waiting on the green light. It flashes and with a smack on the number one jumpers’ buttock he disappeared out the door. A flash of daylight and then another one left the aircraft, then another, until they were all gone. All that was left swinging in the air was the static line that pulled their chutes open. The plane turned and headed back around for the next pass. It was my turn to exit now. The process started over. At first, this morning I thought about things and wondered what would happen if my chute didn’t open and my reserve failed. The things that come to mind before you exit an aircraft. I prayed about it last night and this morning and had peace like I have never felt before. I was not nervous at all and was a comfort to some of my fellow jumpers. It was amazing to follow the commands and get ready to exit the C-130 in fight for the first time. THIRTY-SECONDS! The time was here. My chalk began to move out the door, I was number seven. I handed off my static line and pushed hard and out the door I went. WOOSH! I forgot to start counting. So did everyone else I talked to on the ground. At first I felt the heat of the jet blast and then the wind, I saw my feet, the rear of the plane go by and then a sharp smooth tug above me. A beautiful silk green mushroom was above me. My parachute opened and I had no twists or any malfunctions. The wind picked-up and I started drifting to the edge of the drop-zone. While I was floating at 1200’ it was so peaceful, no sound at all, until I heard the jumpmasters on the ground yelling at us to pull the correct slip. I was drifting towards the trees. They were only six to ten feet high, but they were still trees. I pulled as much rear left diagonal slip as I could and my feet hit the ground. I did my PLF on the dirt road next to the tree line. My parachute covered four small long needle white pine trees on the west side of the DZ. I had made it, now it was time for me to recover my parachute. I was pulling on static lines, bending the small trees over and finally secured my canopy from the tree line. My buddy drifted way off into the trees and I didn’t see him until we got back to the assembly area. I reported it to the Blackhat’s as soon as one came by to check on me. They went and picked him up.
At the assembly area we had an MRE for lunch, this time it was Cheese Manicotti. Not bad at all. I was starving, anything would have been good. We put our chutes into the back of a tractor trailer and got on a bus back to the harness shed.
At the harness shed we had our reserves checked and got a new parachute. Back to the benches to gear up for the next jump. The other chalks that left the assembly area before us were already JMPI’d and ready for the bird. We started the buddy rigging again. JMPI, sit watch the video again, front and rear check, and get ready to go again. It was 1550hrs when my bird came to throw me out again. On the aircraft much of the same but this time we switched doors. I was to exit out of the right door and was the number three man. The guy in front of me had been real nervous and acting funny, he said that he was fine. All the commands went off without a problem. We started to the door and he stopped after the first person jumped and stutter stepped and caused me to get out of rhythm. I jumped and began to twist in air. This is not a problem, but it kind of a wild ride. I counted this time and got to three thousand and that wonderful tug on the shoulders, my parachute blossomed open nice and round. I had about eight twists and was wound up like a kid on a swing in the yard. I checked my canopy and it was good, and then began the process to correct my risers. I reached back behind my head pulled down and out on the risers and began bicycling my feet. This motion made me start to spin and the twists came right out. Now it was time to prepare to land again. I found myself drifting and was able to correct my drift and land almost center of the drop zone. It was a prefect PLF and I quickly gathered my gear and started to move out when Petty Officer First Class Pierce started down. I went to a knee and waited for him to land. A PLF and he was on the ground, the wind gusted and began to drag him down the drop zone. I yelled at him to activate a canopy release and he did. It continued to drag him. I ran a jumped on the partially deflated the chute and it died down. I then checked on the Petty Officer. We was grateful, it had pulled him over twelve feet and would have continued to drag him unless someone helped him out. He had dirt all over him and this fine powdery dust here made him look like a cinnamon coated sailor. We gathered hi gear a headed for the assembly area. On the way two soldiers collided in air and their parachutes collapsed. They followed all the proper steps, activated their reserves and made a successful landing. We all made it through jumps one and two. A few rolled or twisted ankles from improper landing procedures, but nothing else at this time. GOD was with each of us today and I thank him for all that HE does for us and will continue to do!
It is time for me to get to bed and try and get some rest. Formation will be at 0350hrs in the morning and we will conduct a combat jump in the morning starting at 1000hrs followed by another jump starting at 1500hrs. It will be an extremely long day tomorrow. We must get all the parachutes that the company has jumped out and shake the chutes out. This is done to help the riggers fold and put the chutes back in the harness pack trays. We will be out in the harness area until at least 2200hrs tomorrow night. The good thing we will be able to sleep the following the morning and formation will be at 1300hrs on Wednesday.
Enough for now, more adventure tomorrow.
PULL-UPS for the day: 20
Sunday, April 26, 2009
Day: April 26, 2009
Day: April 26, 2009
Weather report: mid-90’s today, humidity 24% wind calm today, that’s a first
Today is laundry and haircut day. The 1SG and I are going to Ranger Joe’s to get haircuts and he needs a new set of dog tags. We conducted a dog tag inspection on Friday and he had on the wrong set. He left his personal ones in Okinawa, Japan. The ones he has been wearing are from a Marine he lost in Iraq. He wears them in his honor and memory. He said, “He was the only Marine he lost on their deployment”. I admire him for keeping the dog tags with him and remembering the Marine that he lost serving our country.
We went and had lunch at Chili’s and it was ok. Not the best thing I have had since I’ve been here nut good. We the headed back to the barracks and for the get together. It was hot. Everyone was miserable so no one hung out very long and retreated to the comfort of their rooms.
Formation was at 1800hrs today. The recall formation was a joke. We had an accountability check and then they made us all drink a drink mix to keep us from getting dehydrated tomorrow. Our formation in the morning is at 0400hrs. We are scheduled to jump TWO times tomorrow; one normal (Hollywood) jump and the other one with full combat equipment. Wish us luck and may GOD keep us all safe!
PULL-UPS for the day: 0
Weather report: mid-90’s today, humidity 24% wind calm today, that’s a first
Today is laundry and haircut day. The 1SG and I are going to Ranger Joe’s to get haircuts and he needs a new set of dog tags. We conducted a dog tag inspection on Friday and he had on the wrong set. He left his personal ones in Okinawa, Japan. The ones he has been wearing are from a Marine he lost in Iraq. He wears them in his honor and memory. He said, “He was the only Marine he lost on their deployment”. I admire him for keeping the dog tags with him and remembering the Marine that he lost serving our country.
We went and had lunch at Chili’s and it was ok. Not the best thing I have had since I’ve been here nut good. We the headed back to the barracks and for the get together. It was hot. Everyone was miserable so no one hung out very long and retreated to the comfort of their rooms.
Formation was at 1800hrs today. The recall formation was a joke. We had an accountability check and then they made us all drink a drink mix to keep us from getting dehydrated tomorrow. Our formation in the morning is at 0400hrs. We are scheduled to jump TWO times tomorrow; one normal (Hollywood) jump and the other one with full combat equipment. Wish us luck and may GOD keep us all safe!
PULL-UPS for the day: 0
Subscribe to:
Posts (Atom)